I’m hesitant to even call this a recipe since you pretty much are cramming some lemons and salt in a jar, but it does create one of my favorite condiments, preserved lemons. They add in a ton of flavor to any dish they’re in and it’s a very specific flavor. You’ll know it if you’ve ever had Moroccan or Middle-Eastern food. They’re lemony and cured with a slightly sour note in there. It’s very different from a fresh lemon, but you still know it’s lemon. It’s the equivalent of how sauerkraut tastes like cabbage, but not at all like fresh cabbage.
Making preserved lemons uses the same fermentation method as sauerkraut in that you’re developing lactobacillus, good bacteria, to create the fermenting environment and to keep mold, and any other pathogens you don’t want, from growing in there. The environment is intensely acidic and salty, perfect home for your new little lactobacilli.
The best part about making these is it takes all of 5 minutes of actual work on your end, and then you just wait a few weeks. Once the waiting time is up, you are rewarded with a substantial jar of preserved lemons that will last a good while and if you’re like me, it just gives you an excuse to make a myriad of dishes using them. One of my favorite is grilled fish with preserved lemon and pomegranate sauce.


It’s very different from a fresh lemon, but you still know it’s lemon. It’s the equivalent of how sauerkraut tastes like cabbage, but not at all like fresh cabbage.


Ingredients for Preserved Lemons
You only really need two things: lemons and salt. The rest is optional—but great if you like a little spice or warmth.
The Essentials
- 4–6 lemons (preferably organic)
- ½ cup sea salt (no iodine, no anti-caking agents)
Optional Seasonings
- 8 whole cloves
- A small pinch of whole peppercorns
- 1 small chili pepper
- 1 cinnamon stick

How to Make Preserved Lemons
- Clean Your Jar
Make sure you’re starting with a super clean jar. I prefer one with a plastic lid, the metal ones tend to rust once they get that salty solution on them. - Prep the Lemons
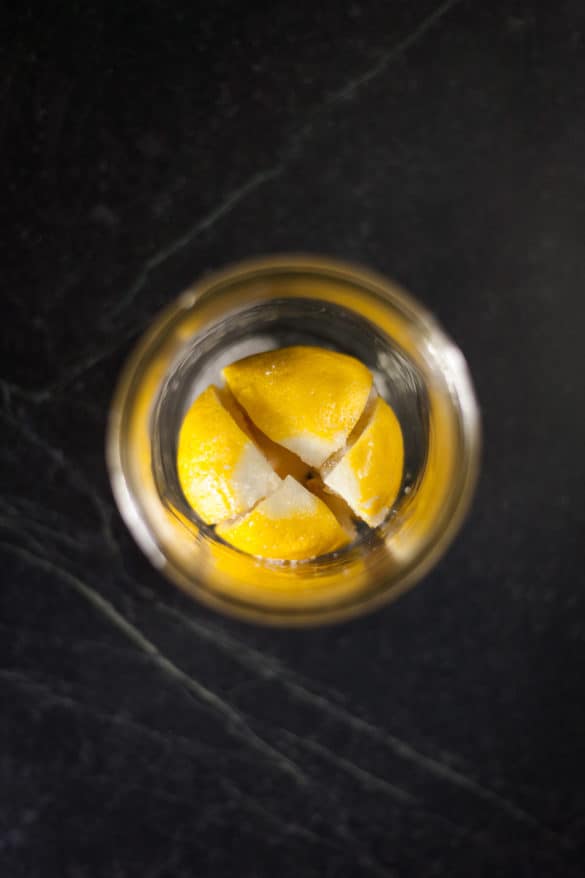
Wash your lemons well and trim off the ends. Then slice each one into quarters—but not all the way through. Keep the base intact so they fan open like a flower. - Salt and Pack
Sprinkle a good pinch of salt into the bottom of the jar. Then, generously stuff each lemon with about a tablespoon of salt and pack them tightly into the jar. Really press them down—you want to start releasing some juice. If you’re using spices, scatter them in as you go. - Top It Up
Once the jar is packed full of lemons, if the juice hasn’t covered everything, squeeze in the juice of one or two extra lemons. Your goal is to submerge the lemons fully, with as little air as possible in the jar. - Seal and Wait
Screw on the lid, turn the jar upside down, and give it a gentle shake. You’ll probably still have some undissolved salt at the bottom—that’s fine. Store the jar in a cool, dark place for 3–4 weeks. - Check On It
Give the jar a shake every few days, and keep an eye out for anything strange (mold is rare, but possible). If the liquid level drops significantly, top it off with more lemon juice to keep everything submerged.
When Are They Ready?
After 3–4 weeks, your lemons should be soft and almost translucent. That’s your sign they’re ready to use. Store the jar in the fridge from here on out—they’ll last for months.


How to Use Preserved Lemons
You only really need the peel—the inside fruit is usually too salty. Just pull out a lemon, rinse it under water to remove excess salt, scrape out the pulp, and finely chop the rind.
One of my favorite ways to use these preserved lemons is in my Grilled Trout with Preserved Lemons and Pomegranate – Easy and flavorful grilled trout with preserved lemon, pomegranate, cilantro, harissa and pistachios all served over a bed of couscous. A delicious dinner that is so easy to make!

Tips for the Best Preserved Lemons
- Choose thin-skinned lemon or even a variety like a Meyer is great—they break down more easily.
- Salt generously. Don’t skimp. The salt is what makes this all work.
- Push lemons down hard to eliminate air pockets and get the juices flowing.
- Don’t stress about perfection. The process is forgiving—just keep things clean and lemons submerged.

FAQs About Preserved Lemons
How long do preserved lemons last?
Stored in the fridge, they can easily last 6 months or longer.
Do you use the whole lemon?
To make them yes, you’re using the whole lemon. To eat them, you mostly just want the peel. Rinse it, remove the inner pulp, and finely chop the skin.
What do they taste like?
Lemony, salty, slightly fermented, and super savory. They’re like a little citrusy umami bomb. The flavor is really unlike anything else.
More recipes to Try:
Grilled Trout with Preserved Lemon and Pomegranate – Easy and flavorful grilled trout with preserved lemon, pomegranate, cilantro, harissa and pistachios all served over a bed of couscous. A delicious dinner that is so easy to make.
Chili Crisp – This homemade chili crisp is crispy, crunchy, spicy, and packed with flavor. Easy to customize with pantry spices, it’s your new favorite condiment for eggs, noodles, dumplings, and more.
Grilled Eggplant – Grilled eggplant with homemade fresh ricotta cheese and a parsley and harissa gremolata.
Quick Pickled Red Onions – This easy, no-cook recipe for quick pickled red onions is ready in 20 minutes. Tangy and crisp, these are the perfect topping to any dish.
Tomato Jam – A simple tomato jam recipe that is going to be your new favorite condiment.
Hummus Bowl with Spiced Ground Beef – Creamy tahini hummus bowls topped with spiced ground beef, pickled onions, olives, and herbs. Serve with warm pita or homemade pita chips for the best dinner!
Did you make this recipe?
Did you try this Preserved Lemons recipe? Leave a comment and star rating below with your thoughts or share your version on Instagram by tagging @TheMostHungry. I can’t wait to see it!

Preserved Lemons
Ingredients
The Preserved Lemons
- 4-6 lemons washed well and remove the ends
- 1/2 C sea salt make sure there is nothing else in there, no anticaking agents, no iodine, nothing.
Optional Seasonings
- 8 whole cloves
- small pinch of whole peppercorns
- 1 chili pepper
- 1 cinnamon stick
Instructions
- First step is to make sure you have a very clean jar to start with. You want a canning style one, so any CO2 gas that gets created can easily escape out of the lid. Then you want to clean your lemons, and chili pepper if you’re using one. And be sure to trim off the ends. This just helps to make sure that no bad bacteria or unwanted mold starts growing in there.
- Next, you want to quarter your lemons almost all the way through, try to leave one end still intact. It just makes it easier to stuff the center of the lemon with salt and then kinda close it back up, and shove the whole lemon in your jar.
- Add a big pinch of salt to the bottom of your jar, then take your lemons and stuff them with salt, about a tablespoon each. The measurement isn’t too exact, you just want to make sure they’re generously covered in salt. Then stuff ‘em on in your jar and push them down to release some of their juice. If you’re using them, scatter your spices in there too. Once your jar is filled up as much as you can with with lemons add the juice of another lemon if you need it. When you screw on the lid, you want to try and have as little air as possible. Next, turn your jar upside down and shake a little to get any extra salt dissolved and incorporated amongst your lemons. Don’t worry if you still have a bunch of undissolved salt sitting at the bottom. It’ll dissolve over time.
- Then all you need to do is place your jar in a cool, darkish spot and wait. You occasionally wanna check on it, make sure no weird mold stuff is happening, and if the liquid level goes down drastically, as the lemons settle, top it off with some more fresh lemon juice. You want to wait around 3-4 weeks.
- When you’ve finished waiting and are ready to use those lemons, just pop open the jar, pull out a lemon and slice off the amount you want to use. You want to rinse it to remove any excess salt, and cut out the fruity inside stuff. You really only want to use the skin. It has the most flavor, the fruit bit just tends to be overly salty.
- Store your finished jar of preserved lemons in the fridge and maybe start on a new batch depending on how fast your think you’ll use them!
Notes
Did You Make This Recipe?
Leave a comment with your thoughts or share your version on Instagram by tagging @TheMostHungry. I’d love to see how you made it your own!

Want more recipes like this delivered right to your inbox?
Sign-up to the Substack newsletter below:
Subscribe
Hi, I'm Rachel — the cook, photographer, and recipe developer behind Most Hungry.
This is my go-to spot for bold, approachable recipes rooted in Italian and Italian-American cooking, from hand-rolled fresh pasta to fall-off-the-bone ribs. Great food should be fun, doable, and absolutely delicious. Learn more about me →